Showing posts with label Pork. Show all posts

Friday, July 7, 2017

Super Easy And Amazing Keto Ribs


It has been two months since the tornado came through and destroyed our home. Two weeks ago we finally moved into the new place, but it is definitely a work in progress. Today is July 3rd and I decided that we would make some keto friendly ribs to celebrate Independence day. Primarily because they are on sale for $1.99/lb, which is about 50% off there regular price. Usually, I like to cook my ribs in the smoker or on the grill, but both of these are either MIA or out of commission at this time due to the tornado. That's Ok, even if you do not have a grill or a smoker, you can make delicious keto friendly ribs in your oven that you and your family will love, I promise!

In this article, I wil be talking about cooking baby back ribs. You may notice in the picture the packages are labeled 'loin ribs', which is the actual butcher's term for this cut of meat. Loin ribs are cut from where the rib meets the spine or backbone of the animal after the loin has been removed. Because they are a smaller cut than the 'St. Louis style (aka spare rib)' they have acquired the more common name “baby back ribs”.


The Ribs

When a pig is butchered, the complete rib cage (just below the spine to the ends) can be broken down into several options depending on the butcher or processor. When breaking down the rib cage to be sold as ribs, the most common cuts are back loin (baby back's) spare ribs, and rib tips. As previously mentioned, loin or back ribs are cut from where the rib cage meets the spine after the loin is removed. This upper portion of the ribs are more commonly called baby back ribs, not because they come from a baby pig, but because they are a smaller cut and are located closer to the spine or back. The larger portion or middle of rib, those that come in the big cryopack packages in your supermarkets meat department are spare ribs. Rib tips, are the small portions, or tips of the ribs that are cut from the lower part or bottom of the rib cage. When I worked in the restaurant, we purchased whole slabs of pork ribs and seperated the racks ourselves. These days, the ability of the home cook to purchase a complete rack of pork ribs (loin, spare, and rib tips) is pretty rare. So there you go, a small lesson in the way that pork ribs are cut and processed. Believe it or not, no baby pigs were hurt in the making of these ribs. Having said that roast suckling pig is quite a delicious dish if you ever have he opportunity to try it, I highly recommend that you do. Anyway, let's go cook some amazing ribs in the oven!


The Rub

As with my article 'Ketofied Texas Brisket' I will be using my all-purpose barbecue rub. I no longer add any sugar to my barbecue rubs, but if you can if you wish, just remember you have to account for the sugar in the nutritional information. If you like you can add a zero calorie sugar substitute such as erythoil (¼ – ½ cup) which is popular in the LCHF /Keto community, but I personally do not like the cooling effect that erythoil has on the palate. The following recipe yields about 1 1/3 cups of rub.

5 tablespoons chili powder
4 tablespoons garlic powder
4 tablespoons onion powder
4 tablespoons paprika
2 tablespoons salt
1 tablespoon black pepper
2 teaspoons red pepper
2 teaspoons cumin, ground
1 teaspoon cinnamon, ground

In a bowl, combine all dry ingredients and mix well. Place the baby back ribs in a heavy-duty baking pan and sprinkle each side generously with the dry rub making sure to rub the spice mixture into the meat. Cover the pan with plastic and place in the refrigerator overnight.

Whole Recipe (1 1/3 cups)
Calories – 445, protein 19.4 grams, fat 10.9 grams, carbohydrates 57.8 grams

Per Serving (¼ cup)
Calories – 89, fat 2.18 grams, protein 3.88 grams, carbohydrates 11.6 grams


The Recipe

2 slabs pork loin (baby back ribs)
½ cup all-purpose barbecue rub
LCHF barbecue sauce of choice (optional)

Place the baby back ribs in a heavy-duty baking pan meat side down. At this point you should be looking at the inside of the rib cage. You will notice that there is a smooth, shiny membrane on the back of the ribs. This membrane is the lining of the pleural cavity (lung cavity) and needs to be removed before your rub is applied. It takes a little practice, but work at picking away the membrane until you can get a finger or two underneath the membrane and simply peel it off. It may take you a few tries until you get it all off, but it needs to be removed before your rub is applied and the ribs are cooked.


Once you have removed the membrane from the inside of the ribs, sprinkle each side generously with the dry rub making sure to rub the spice mixture into the meat. Cover the pan with plastic and place in the refrigerator overnight.


The next day, about three hours before you are ready to eat the ribs, remove the pan with the ribs from the refrigerator and place each rack on a sheet of heavy duty aluminum foil about four inches longer than the slab of ribs. Wrap the ribs tightly in the aluminum foil making sure to fold the ends tightly to seal the packet. While you are wrapping the ribs, do not forget to pre-heat your oven to 250 degrees.


Once the oven it has reached the desired temperature of 250 degrees, place the foil wrapped ribs on a baking sheet and bake for 3 hours. No muss, no fuss, and no need to baste, as the sealed foil packages will use the 
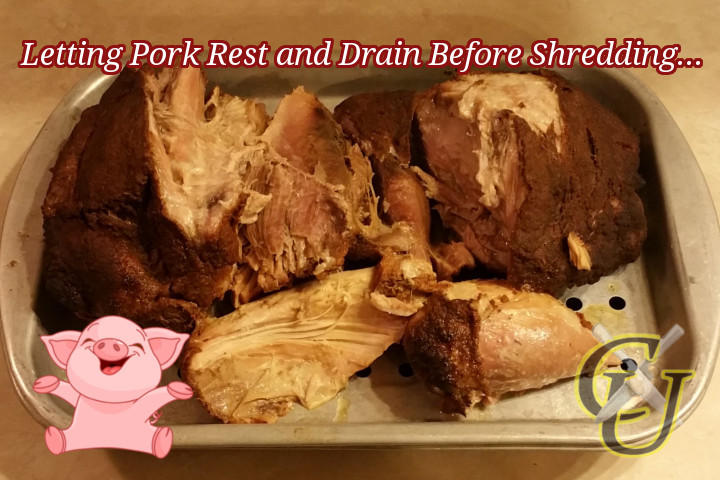
meats own moisture to keep the ribs nice and juicy. After three hours, remove the ribs from the oven and allow to sit for 10 minutes before opening the foil packages.


Chef's Note: If you like, once the ribs are done, you can immediately open the foil packages and lightly brush them with your favorite warmed barbecue sauce, increase the heat of your oven to 350 degrees and cook the ribs for an additional 15 more minutes to slightly thicken and carmalize the sauce. Just be careful as the steam released from the foil packets when opened is very hot and you can burn yourself easily. Usually, I let the foil packages cool for about 10 minutes before opening and brush them with warmed barbecue sauce and serve as is.


Nutritional Data

Determining the exact nutritional data for baby back ribs is somewhat an art form rather than a science as each slab of ribs will have a slightly different amount of fat on the rib cage. I have done my best to give you a general idea of the amount of fat and protein that you can typically expect in one pound of uncooked ribs. By adding this to our all purpose rub, I have come as close as possible to providing you with the most accurate information that I can. The average size of a cryopack loin or baby back ribs before cooking is 2.5 pounds, which is what the following nutritional values are based on. I use about ¼ cup of rub per rack of ribs.

Whole Rack Baby Back Ribs (2.5 lbs, no rub)
Calories – 2025, fat 163 grams, protein 133 grams, carbohydrates 0 grams

Whole Rack Baby Back Ribs (2.5 lbs, with rub)
Calories – 2114, fat 165.18 grams, protein 136.88 grams, carbohydrates 11.6 grams

Half Rack A Of Ribs (1.25 lbs, with rub)
Calories – 1057, fat 82.6 grams, protein 68.44 grams, carbohydrates 5.8 grams

Third Of A Rack Of Ribs (0.83 lbs, with rub)
Calories – 704, fat 55 grams, protein 45.6 grams, carbohydrates 3.8 grams


Conclusion

That's all there is to making delicious, tender, and juicy baby back ribs that you and your family will enjoy. Best of all you did not have to pay restaurant prices for this fabulous meal. So go ahead and sing to your hearts content “I want my baby back, baby back, baby back ribs” with the satisfaction of knowing you saved a ton of money by making them yourself without having to leave the comfort of your home. If you need a good LCHF / Keto barbecue sauce to pair with your ribs, check out the variety of barbecue sauces from our blog by clicking on one of the links below. As always if you and your family have enjoyed this LCHF / Keto recipe and you have found the information useful, we ask that you share it with your friends on Facebook, Pintrest, and Google+. Don't forget to follow us on Facebook, or add us to your circle of friends on Google+.


Related Article On Our Blog:

Condiments, The Diet Killers: Making Your Own LCHF Condiments (This article contains recipes for making Texas and Carolina Style LCHF / Keto barbecue sauces).


Wednesday, February 22, 2017

Keto Shake And Bake


We eat a lot of chicken in our home, and one of my favorite recipes is chicken deep fat fried in lard without any coating and then lightly brushed with butter and seasoned with salt and pepper (For more information on this recipe, check out Butter Bob's video on Fried Chicken). But it takes a fair amount of time to setup and clean up. One of our favorite alternative recipes is oven baked “fried” chicken using my homemade version 'Shake And Bake' made with ground pork rinds in place of the wheat flour products.

This recipe makes a delicious oven fried chicken that is better than the original Kraft recipes both nutritionally and in it's flavor profile. This low carbohydrate high fat (LCHF) and Ketogenic (Keto) recipe will really amaze you at how well a low carbohydrate seasoned coating can taste. The best part about this recipe is that it is easy to make and it tastes fantastic. In this article, I will be teaching you how to make your own Keto style Shake and Bake that both you and your family will love.


The Recipe

This homemade LCHF / Keto Shake and Bake recipe does include a small amount of cornstarch which adds a total of 4.6 carbohydrates to the overall recipe, but the end result is that each piece of chicken only contains about 1 carbohydrate per piece. Personally I believe that the minimal amount of cornstarch used it an integral part of the coating mix.

1 ¾ cups processed pork rinds (one 5 ounce bag)
2 tablespoon dried parsley
4 teaspoons chicken bouillon
2 teaspoons cornstarch
2 teaspoons paprika
2 teaspoon onion powder
2 teaspoons garlic powder
2 teaspoons salt

Mix all dry ingredients together and store in an airtight container. When ready to use, add 1 cup Keto shake and bake to a medium sized bowl or zip lock bag or container and add the poultry a few pieces at a time and mix until evenly coated. 1 cup will coat about 8 - 10 chicken thighs.


For Chicken – Place on foil lined baking sheet sprayed with a non-stick cooking spray and bake at 400 degrees for 30 minutes or until done, larger thighs or pieces of chicken may take an additional 10 – 15 minutes. Do not cover chicken.

For Pork - Place on foil lined baking sheet sprayed with a non-stick cooking spray and bake uncovered at 425 degrees for 15 to 30 minutes or until done. Do not cover or turn pork chops.

Keto Shake and Bake (Total Recipe: 1 ¾ cups)
Calories – 914, protein 2 grams, fat 50.6 grams, carbohydrates 14.4 grams

Keto Shake and Bake Per Cup
Calories – 522, protein 1.14 grams, 28.9 grams, carbohydrates 8.22 grams

Kraft Shake And Bake Total Recipe (2 pouches)
Calories – 480, protein 0 grams, fat 4 grams, carbohydrates 80 grams

Per Pouch (Coats 6 to 8 pieces of chicken or pork chops)
Calories – 240, protein 0 grams, 2 grams, carbohydrates 40 grams

For nutritional information, one pouch of the original Shake and Bake coats 6 to 8 pieces of chicken per the package instructions. While 1 cup of the Keto Shake and Bake easily coats the same amount of chicken as you can see in the pictures accompanying this article. The big difference here is the caloric and fat intake are quite a bit higher (55% more calories, and 94% more fat) in the Keto Shake and Bake mix while the carbohydrate count is significantly reduced (64% less carbs in Keto Shake and Bake) as opposed to the original Kraft Shake and Bake.


To put this into perspective, if you bake eight pieces of chicken using both the original Kraft recipe versus the Keto shake and bake, you really begin to see the difference when you specifically look at the carbohydrate count. The Kraft original Shake and Bake adds approximately 5 carbohydrates per piece of chicken, while the Keto Shake and Bake only adds 1 carbohydrate per piece of chicken, that's 80% less carbohydrates overall. As for fats, the Keto Shake and Bake adds about 3.6 grams of fat per piece of chicken (28.9 grams / 8 pieces = 3.61 grams per piece), so fat wise, it fits in just fine with our LCHF / Keto diet plan.


The Ingredients

The big advantage to making your own is that you can make this old family favorite LCHF and Keto friendly by substituting ground pork rinds in place of the bread products (carbohydrates). By removing the unwanted carbohydrates (flour, breadcrumbs, and sugar) this seasoned coating is virtually carbohydrate free, and it tastes great. You can go one step further and eliminate the powdered chicken bouillon in this recipe if you are wanted to eliminate the MSG, but personally I like the recipe as it is. Feel free however to modify it to suit your personal tastes.

Shake and Bake Original Chicken Seasoned Coating Mix – Enriched wheat flour (wheat flour, niacin, reduced iron, thiamin mononitrate [Vitamin B1], riboflavin [Vitamin B2], folic acid), enriched bleached wheat flour (bleached wheat flour, niacin, reduced iron, thiamin mononitrate [Vitamin B1], riboflavin [vitamin B2], folic acid), maltodextrin, salt, partially hydrogenated soybean and cottonseed oils, canola oil, paprika, contains less than 2% of celery seed, spice, high fructose corn syrup, dried garlic, yeast, dried onions, natural flavors.

Keto Shake & Bake – Pork rinds (ground), salt, sugar, cornstarch, paprika, onion powder, garlic powder, dried parsley, and powdered chicken bouillon*.

*Chicken bouillon contains quite a few additives including monosodium glutamate (MSG). For further reading on the ingredients of powdered bouillons, see my previous article: 'Restaurants Use Them, So Should You?'


Conclusion

Making your own Keto style Shake and Bake gives you another tool in your arsenal to cook delicious LCHF and Keto meals. You can use this recipe to coat both chicken and pork to add a delicious and crunchy coating that is far easier and less messy than frying. By using ground pork rinds in place of the wheat products it reduces the overall carbohydrate count by 80%, or about 1 gram of carbohydrates per piece of chicken. The great thing about using ground pork rinds is that they are neutral in flavor and when baked, the pork rind coating tastes just like a flour style coating. In fact, I served it to some non-keto friends and when I told them afterwards that the coating was made of ground pork rinds they were amazed.

While I have not made it personally as my wife is not a big fan of hot and spicy. If you want a spicy style coating then try using hot pork rinds. I would advise that you stay away from the barbecue flavor as the have about 3 carbohydrates per serving (added sugar) or about 30 carbohydrate for a 5 ounce bag! I hope you will try this recipe and that you will find it a great alternative to commercially prepared Kraft Shake and Bake. As always, I hope that you have found this article informative and beneficial for you and your family, if so please take the time to share it with your friends so that they can benefit as well. Don't forget to follow our blog, or check us out on our Facebook page 'CulinaryYouLCHF' or add us to your circle on 'Google+' to continue to receive our latest LCHF and Keto recipes.


Similar Articles On Our Blog:


References:

Butter Bob's Fried Chicken Video


Friday, December 23, 2016

Eating LCHF: Red Meat, Pork And Poultry On A Budget


If you are new to the low carbohydrate high fat (LCHF) or Ketogenic (Keto) lifestyle, I am going to encourage you to do one thing for the first three or four months until you have developed good eating habits, and that's follow the 'KISS' principle. Of course 'KISS' is normally an acronym for 'keep it simple stupid', but I also like to think of it as meaning 'keto is simple stupid'. Now, before anyone gets riled up, the point is that following a keto eating program is really easy if you purchase the correct foods and prepare them properly. My advice is that you stay away from the LCHF and Keto dessert recipes as much as possible as overeating of these so called “fat bombs” and other low carb treats can blow you right out of ketosis. Once you have the basics of the Keto lifestyle down and have been doing it for several months, then slowly start adding some “treats” to your eating plan.

In my previous article, I talked about strategies you can use to help stretch your food dollars when you embark on a low carbohydrate high fat (LCHF) or Ketogenic (Keto) lifestyle. While it might cost a little more to eat LCHF and Keto due to the increased amount of protein sources, money should not be your biggest hurdle, most people fail because they purchase the wrong foods, or do not prepare enough ready meals during the week. Now that you know where to buy food and how to store it, let's examine what to buy in order to help you meet your weight loss goals. BTW, If you haven't read my previous article 'Money SavingLCHF and Keto Strategies', you can find it by following this link.

I mentioned that Keto is simple, well it is, you have only one goal, and that is to keep your total carbohydrate intake less than 20 grams a day. Sounds hard right? Well actually it is pretty simple, and I am going to show you how to accomplish this goal without breaking the bank and help you to stay “keto strong”. Let's face it if you do not have LCHF and Keto friendly foods in your home, then you are destined to fail, and no ones wants that. So let's look at some of the basic type of meat and poultry that you should be looking for on sale when eating LCHF and Keto.


Cheaper Cuts Of Meat and Poultry

First, all unprocessed meats and poultry contain zero carbohydrates, so on LCHF or Keto you generally want to purchase cheaper cuts of meat. Why you ask? Well, the great thing about cheaper cuts of meat is that they are higher in fat, and that's exactly what we are looking for when eating LCHF and Keto. In fact, cheaper beef and pork roasts generally have more fat, and purchasing chicken (thighs and legs) in family packs with the skin on is far cheaper than purchasing lean chicken breasts. Yes, remember natural fats from animal products are good, and triglycerides are bad. Btw, animal fat does not normally contain any triglycerides.

For now, don't worry about your beef being “grass feed” or your chicken being “organic” or “free range”. We are in budget mode, and these options cost way more, and there is no guarantee that they are actually what the label states. If you want to purchase these types of items later then go for it, for now our focus is getting you started on keto without wiping out your food budget. Don't get me wrong, I am not talking about buying inferior cuts of meat, I am talking about purchasing the cheaper higher fat cuts, that many so-called “health addicts” think are bad for you.


Beef

Fat is flavor, a rib-eye or sirloin steak with a good amount of marbling is far more tasty, and less apt to dry out on the grill then one with less fat. Having said that, we generally do not purchase a lot of steak, but when the opportunity presents itself (i.e. it's on sale) we purchase it and place it in the freezer for later use. Our primary source of red meat protein comes from roasts, and ground beef. If you have the disposable income to purchase steak on a regular basis then I suggest rib-eye as one having the best fat to protein ratio and is also one of the best tasting cuts, sirloin would be my next choice.

Beef Stew Meat – Forget buying the pre-packaged beef stew meat and buy the whole roast instead. Doing this and cutting your own beef stew meat will save you about 20 – 30% off your purchase, and you have the option to either cook it as a whole roast, or cut it up and use it for many other Keto dishes that require cubed beef.

Ground Beef – Forget about the lean and go for the fat! Use the high fat hamburger (73/27) when making hamburger patties, meat loaves, meat balls, spaghetti, or cooking tacos. It is also great for hamburger stew and Keto dirty rice made with cauliflower. Not only is the higher fat better for you when you are on a LCHF diet, it is easier on your wallet. They only time that I buy lean ground beef is when I am making my own jerky (it needs to be lean to prevent spoilage), otherwise, go for the fat.

Roasts – Chuck, pot or rib, it does not matter. We purchase which ever ones we can get on sale. Beef roasts are used in a variety of recipes at our house. In addition, to cooking them whole, we cut them up to make beef stew meat that can then be used to make, stew, chili, curry, and even barbecue. Purchase the cheapest you can find and trim it if you wish. For slow cooker and pressure cooker recipes the type or grade of roast doesn't matter as the cooking process will tenderize the meat. Again the emphasis is to purchase the cheaper roast to stretch your food dollars.

There are obviously other cuts of beef, that you can buy and incorporate into your menu plan (ribs, flank steak, brisket, etc...), but the ones listed in this article will supply you with the most bang for your buck which is extremely important when you are doing Keto on a budget.


Chicken

You can purchase whole chickens and break down the carcasses and use the bones for bone broth, or you can simply purchase legs and thighs. Legs and thighs with the skin on can usually be purchased in family packs and I can often find them on sale for as low as $0.49 per pound, but more commonly in the $0.69 - $0.99 per pound price range. Especially if you are willing to purchase the 5lb bags of legs and thighs which are often sold at even cheaper prices. I have never really been satisfied with the 5lb bags of legs and thighs, they always see to taste different to me, so I generally just purchase the family packs of legs and or thighs when I can get them on sale. Unless you just get a great price on whole chickens, I recommend purchasing the legs and thighs when just starting on your keto lifestyle.

Legs (Drumsticks) – Depending on the size of the drumstick the grams of fat and protein vary, but on average the protein to fat ratio is about 2:1. When it comes to calories, 48% of the calories come from fat, and 52% of the calories come from protein.

Thighs – Depending on the size of the thigh the grams of fat and protein vary, but on average the protein to fat ratio is about 2:1. When it comes to calories, 58% of the calories come from fat, and 42% of the calories come from protein.

Yes, you can buy split breasts, and whole chickens if you like, but you will get your best value when you purchase the family packs of drumsticks, thighs, or leg quarters when they are on sale. Purchasing whole chickens allows you to make bone broth which is full of Keto goodness, but if you are just starting out I would rather you focus on keeping your carbohydrate count under 20, then attempting to learn to many things at one time. Get the basics down first, learn to spend wisely, and then expand your repertoire.


Pork

Also known as the other white meat, pork can be an important part of your Keto meal planning, unless of course you do not eat pork for religious reasons. So if pork is a no go for you, then skip this section, but for everyone else, pork is a big part of the LCHF and Keto diet. We generally avoid purchasing traditional pork ribs and baby back ribs unless we can get them at rock bottom prices, simply because you are paying for way to much bone as opposed to meat.

Bacon – Bacon is your friend when you are on a LCHF of Keto diet. Having no carbohydrates and being high fat make this crunchy goodness a dietary staple for many following a LCHF or Keto eating program. You can eat almost all the bacon you want when doing Keto, but I would not recommend eating a pound of bacon a day, there are simply better sources of protein, but having 3 – 5 slices of bacon with your breakfast, and having some crumbled in your salad are definitely acceptable.  I eat three slices of bacon everyday with my breakfast, so we go through a lot each week. Btw, the fat to protein ratio of bacon is about 1:1, that's one gram of fat for each gram of protein.

Just be careful when selecting bacon, there are some varieties that have sugar such as 'Maple Bacon Flavor'. It may indicate that there are no carbs on the package, but the USDA let's them list an ingredients as zero carbs, it is is generally < 0.8 grams per serving.

Breakfast Sausage – Another high fat low carb breakfast option is pork sausage. While the percentage of fat may vary between brands, most ground pork breakfast sausage is 20 to 30% fat. Unlike bacon, breakfast sausage does have some seasonings and spices (including sugar) that can cause it to have about 1 carb per ounce, so make sure you check the label. Breakfast sausage is a great ingredient for making Cajun style sausage with cauliflower rice (aka. dirty rice).

Chops – Pork chops (blade, rib, and center cut) are a great source of both protein and fat. Like chicken, purchase them in the family packs to maximize your savings. Just as with beef, the lower cost cuts have more fat, however the protein content is the same. If you think there is too much fat on the cheaper chops, then you can trim them, but we do not worry about it, we simply eat the fat. Every couple of weeks the Hispanic markets in the Dallas/Ft. Worth (DFW) area have pork chops on sale in the family packs and we get them priced matched at our local Walmart. While the fat content will vary depending on whether the chops, are thick or thin cut, pork chops generally have a 1.6:1 protein to fat ratio with 54% of the calories coming from fat, and 46% from protein.

Hams - Cut from the hind leg, hams can be another good source of protein. Care must be taken however to ensure you get the best possible ham when you are on a Keto of LCHF diet. Fresh hams are your best choice, smoked or cured hams can also be a good choice if they contain no sugars. Stay away from most spiral cut hams as they generally contain sugar. You will also want to avoid any hams that contain one of the following in the description 'honey', 'Black Forest', Virginia, Maple cured...etc Always look at the label to determine the sugar content. Even if it states zero carbs, if it has one of the previous words in it's title choose another type of ham.  

Roasts – Whether it is a pork butt (aka Boston butt), shoulder (aka picnic), or blade roast like beef, purchase which ever pork roast you can get on sale. In general, the protein to fat ratio for pork roasts is about 1.3:1, however 39% of the calories the calories from pork roasts come from protein, while 61% come from fat. Trimming some of the fat from a roast can reduce the fat percentage, but remember when eating LCHF and Keto, fat is good. Pork roasts are used in a variety of recipes at our house. In addition, to cooking them whole and served sliced as a roast, we use them to make pulled pork barbecue sandwiches, with our LCHF barbecue sauce. Like beef, they can also be used to make, stew, chili, and various curries. Purchase the cheapest roasts you can find and trim them if you wish. For slow cooker and pressure cooker recipes the type of pork roast doesn't matter as the cooking process will tenderize the meat. Again the emphasis is to purchase the cheaper roast to stretch your food dollars.


Conclusion

There are many different meat related protein sources that you can purchase when on a LCHF and Keto diet. Obviously, you want to purchase the ones that you and you family will enjoy. I have listed some of the best purchases you can make if you are on attempting to eat LCHF or Keto on a budget. Remember to use the money saving strategies that I discussed in my previous article 'Strategies To Control Your LCHF/Keto Budget'. Having your refrigerator, freezer and pantry stocked with LCHF and Keto friendly items allows you to make more recipes from scratch allowing you to stretch your food dollar even more, especially if you can buy them when they are one sale.

Yes, you can purchase whole chickens, and beef and pork ribs which have a lot of bones so that you can make nutritious bone broth, but such purchases are more expensive. If you are on a limited budget, or are just starting out I would ask that you concentrate on purchasing the types of items listed in this article to get you successfully of your weight loss journey. Once you have become somewhat comfortable with the LCHF and Keto lifestyle, then you can expand your skill set to making bone broth and examining purchasing other items. Having said that, if you can find while chickens, turkey's, or ribs at super low prices, then by all means purchase them.

As always, I hope that you have found this article informative and beneficial for you and your family, if so please take the time to share it with your friends so that they can benefit as well. Do not forget to follow us on our Facebook page 'CulinaryYouLCHF' or add us to your circle on Goggle+.


Similar Article On Our Blog:


References:


Friday, March 18, 2016

Southwest Style Pork Carnitas


While South and North Carolina have pulled pork, in Texas and Mexico we have pork carnitas. So what exactly are pork carnitas? Well it sorta depends on what part of the country you live, but essentially pork carnitas are cooked and shredded pork that is then served with corn or flour tortillas with various condiments such as lettuce, salsa, cheese, hot sauce etc...You get the picture right?

Anyway, the meat of choice for carnitas or at least the one I use is a bone-in pork butt. The size of the pork butt does not really matter as the seasonings and the procees used to cook the carnitas is the same. Just remember that if you are cooking for a large group or you want to place meals in the freezer, that on average, the yield from a pork butt is about 60% of the actual weight of the uncooked meat give or take 10%.


The Recipe

The traditional recipe for pork carnitas is pretty basic, take your pork butt out of the cryovac package season with salt and pepper. Now, I prefer to use my carnitas rub recipe on my pork butt. I simply like my rub better, and I am cooking for me and my family. Having said that, I have included the traditional method as well as my canitas rub so you can choose to go for the more bold flavors of Texas, or the more traditional Mexican carnitas. As always, the choice is yours.

1 bone-in pork butt
1 onion, diced
2 tablespoons lime juice
1 tablespoon minced garlic
1 teaspoon cilantro, dried
salt and pepper or my optional carnitas seasoning (see below)

Add the garlic, onion, lime juice, and cilantro to the cooking device of your choice, then take your bone-in pork butt and season it thoroughly with salt and pepper. Heat 2 – 3 tablespoons of olive oil in a large saute pan and brown the pork butt on all sides, then place the pork butt in the cooking container of your choice and cook as follows. Below I have listed some basic directions for cooking a pork butt in either the oven, slow cooker or pressure cooker.

Chef's Note: Some people prefer to just season the pork butt and place in their dutch oven or slow cooker without browning. Then after shredding they saute the shredded pork in olive oil until it is, slightly crispy. I will be honest, I just usually season my pork butt with my rub, throw it in my dutch oven and cook it. Then when it is done, shred the pork, sprinkle a little extra rub mix into the shredded pork and toss it will it is still warm, then serve.


Oven Method: Place the lid on the dutch oven or large roasting pan and bake for 225 degrees for 10 to 12 hours or until the internal temperature of the meat is greater than 170 degrees. I prefer to use my enamel coated cast iron dutch oven for cooking bone-in pork butts as it has thick walls and heats evenly helping to regulate the temperature more evenly than thin walled roasting pans, but as always you have to use what you have.

Slow Cooker Method: If you are fortunate to have a slow cooker that is large enough to hold your pork butt, then after you have browned it throw it in your slow cooker and cook it overnight or while you are at work. According to the 'Crock-Pot' website a 6-7lb pork butt takes 9 ½ hours (about 42 minutes per pound) on low and 7 ½ hours (about 55 minutes per pound) on high so you will have to adjust your cook times depending on the size of roast you are using.

Pressure Cooker Method : Recently we purchased an electric pressure cooker as my wife is not a big fan of the jiggler type pressure cookers that I have been using all my life. Having said that she uses it quite a bit and it does a really good job at cooking many items, one of the things that it cooks really well is bone-in pork butts. When using the pressure cooker method, add ¾ cup beef broth to the pressure cooker before adding your pork butt as you do not want to rinse the seasoning off your meat. Set your electric pressure cooker on high (9-11psi) and cook for 15 minutes per pound (i.e. a 3lb pork butt would cook for 45 minutes).


Todd's Preferred Carnitas Seasoning Mix

This is my own version of a pork rub that I use when I make pork carnitas rub. It has a more Texas or Southwestern flavor than a traditional pork carnitas seasoning. It is my “go to” carnitas seasoning rub when preparing carnitas for my friends and family. .

2 tablespoons salt
1 tablespoon chili powder
2 teaspoons black pepper
½ teaspoon red pepper
½ teaspoon cumin, ground
¼ teaspoon cinnamon, ground

Mix spices together and store in an airtight container until ready to use. Makes about ¼ cup of dry pork canita rub, shake jar well before using


Conclusion

Making your own pork carnitas at home is easy, and delicious. Most of the ingredients here are recommended in our minimalist pantry series and most of you will have them in your pantry or refrigerator. So your outlay to make this recipe should only be the additional cost of the pork butt. Anyway, this is one of the recipes that my family loves that I just do not make enough of, and I hope it will become one of your families favorites as well. As always, if you have enjoyed this article, please share it with your friends and don't forget to send us a friend request on our 'CulinaryYou' Facebook page and follow us on Google+ so that you will not miss out on any of our new articles.


Resources Used In This Article:


BBQ Smoker Cookbook, By Todd Gamel (currently in editing phase)

Weinstein, Bruce, and Scarbrough, Mark 'The Great Big Pressure Cooker Book', Clarkson Potter, New York, 2015.


Other Money Saving Articles On Our Blog:


Tuesday, January 19, 2016

Barbecue Pulled Pork


Fortunately we live out in the country and are right next door to my mother-in-law, in fact we share a property line. As she is in her late 70's she really just does not like to cook much anymore, so when the family gets together, my wife and I cook most of the meals. Occasionally my mother-in-law throws a frozen lasagna in the oven or has someone go to town for pizza or barbecue and she picks up the tab. Last month when some of the family was here, she sent my brother-in-law to town to buy chopped barbecue brisket. I was shocked to find out that 3lb's of chopped brisket with 16oz of barbecue sauce was $51.00 ($17.00 per pound with the sauce). In fact, I almost fell out of my chair when I saw the receipt, I mean that is crazy expensive.

As you can see from this example, sometimes the downside to living in a small town can be higher prices for some consumer items due to a lack of competition (only one barbecue place in Canton). Before I went to culinary school, I worked for a few years as a manager for Colter's BBQ and Smokehouse here in North Texas. I learned everything there from selecting the best wood and cuts of meat for smoking, to running the pit as well as managing the staff. Now, I am no 'pit master', but there is no way chopped beef brisket should cost this much. So I needed to find a barbecue solution to my mother-in-law's craving for the quick and easy 'Q'.

As always when we are shopping we are looking for good deals on meat. We came across some 10 to 12lb bone-in pork butts marked down to $1.19 lb, needless to say we bought both of them for a total of $25.59. The goal was to make barbecue pulled pork from these pork butts and them vacuum seal them in 1lb packages and place them in the freezer for when the family gets together next time. On average, the yield from a beef brisket or pork butt is about 60% of the actual weight of the uncooked meat give or take 10%. So even if these pork butts only yielded 50% of their original weight (21.51lbs), I would still have 10.75lbs of cooked pork butt which comes out to $2.38 per pound (without the sauce or spice rub).


The Recipe

This recipe is pretty simple, take your pork but out of the cryovac package and then apply your barbecue rub of choice. Now a traditional North Carolina pulled pork rub is somewhat different than a Texas style rib rub. Having said all of that, I prefer to use my rib rub recipe on my pulled pork. I know, I can hear the so called 'BBQ' connoisseur's screaming blasphamy… So shoot me, I like my rub better, and I am cooking for me and my family. Having said that, I have included two rub recipes from the 'BBQ Smoker Cookbook' that I am writing as well as two different styles of barbecue sauce. So you can choose to go for the more bold flavors of Texas barbecue, or a more traditional North Carolina style pulled pork rub. The choice as always is yours.


1 bone-in pork butt (10.5lb)
1 to 1 ½ cups barbecue rub of your choice (see below)
1 to 1 ½ cups barbecue sauce of you choice (see below)


Take your bone-in pork butt and coat it thoroughly with the bar-be-cue rub of your choice. Then place the brisket in a dutch oven or large roasting pan of your choice. Place the lid on the dutch oven and bake for 225 degrees for 10 to 12 hours or until the internal temperature of the meat is greater than 170 degrees.

Chef's Note: I prefer to use my enamel coated cast iron dutch oven as it has thick walls and heats evenly helping to regulate the temperature more evenly than thin walled roasting pans. You could throw the pork butt in your slow cooker if you have one big enough and cook it overnight. According to the 'Crock-Pot' website a 6-7lb pork butt takes 9 ½ hours on low and 7 ½ hours on high so you will have to adjust your cook times depending on the size of roast you are using.


Texas Style Rib Rub (The One I used)

This is my own version of a Texas style rib rub that I developed after working for years in a local Texas barbecue establishment and lots of experiment. It is my “go to” rib rub when preparing ribs for my friends and family. I have found that this rub compliments my own Texas style barbecue sauce very well and I use them in combination to make my favorite ribs as well as the pulled pork in this article.

1 cup brown sugar
5 tablespoons chili powder
4 tablespoons garlic powder
4 tablespoons onion powder
4 tablespoons paprika
2 tablespoons salt
1 tablespoon black pepper
2 teaspoons red pepper
2 teaspoons cumin, ground
1 teaspoon cinnamon, ground

Mix spices together and store in an airtight container until ready to use. Makes about 1 ¾ cups of dry rib rub, store in a cool dark place and shake jar well before each use.


Carolina Style Pulled Pork Rub

Pork is a mild white meat that really absorbs subtle flavors well. This is my version of Steven Raichlen's North Carolina pulled pork recipe from his book “The Barbecue Bible”. I lived in Raleigh-Durham North Carolina (known as the Piedmont region) for about eight months in the mid 1990's and I believe that this dry rub is a good representation of the NC style of pulled pork. Of course, I had to make a few minor changes to Steven's original recipe, but I guarantee you will find this rub both authentic and delicious.

½ cup paprika
¼ cup brown sugar
¼ cup granulated sugar
¼ cup celery salt
1 tablespoon garlic powder
1 tablespoon onion powder
1 tablespoon black pepper
1 tablespoon white pepper
1 tablespoon dry mustard
1 tablespoon chili powder

Mix together and store in an airtight container until ready to use. Makes about 1 ½ cups of dry rub, store in a cool dark place and shake jar well before each use.


The Sauce

While the rub is your foundation of flavor, your sauce rounds out, or finishes off the overall flavor profile of the meat you are cooking. Don't get me wrong, this pulled pork is great just as it is without the sauce, but if you are going to eat it in a pulled pork sandwich or in tacos, you will need some form of sauce to fully enjoy the flavors of the sandwich. As with the rub, I prefer my own Texas Style barbecue sauce, however I have also included a North Carolina style 'piedmont' sauce (also from the cookbook in which I am writing) for a more traditional style North Carolina style pulled pork.

Texas Style Barbecue Sauce

This barbecue sauce is not only great, but it is the foundation or basis of many of variations of ketchup or tomato based barbecue sauces that I have created over time. It is my go to sauce because it is quick and easy to make.

2 cups ketchup
1 cup water
½ cup apple cider vinegar
2 bay leaves
2 tablespoons Worcestershire sauce
1 tablespoon butter
1 tablespoon onion powder
1 tablespoon garlic powder
2 teaspoons cilantro, dried (optional)
1 teaspoon salt
1 teaspoon chili powder
½ teaspoon mustard powder
½ teaspoon black pepper
½ teaspoon red pepper

In a medium saucepan combine all ingredients and bring to a boil. Reduce heat and cover and simmer for 10 to 15 minutes or until sauce is thick and coats the back of a spoon. Remove sauce from heat and cool, makes about 3 cups. If you like a thicker sauce, decrease the amount of water to ½ or ¾ cup or you can just cook it down until it reaches your desired thickness.


North Carolina Style Barbecue Sauce

I first encountered this style of barbecue sauce when I lived in the Raleigh-Durham area of North Carolina. Like everything, most cooks have their own particular take on this vinegar based barbecue sauce that is most often used on pulled pork. My particular variation includes the addition of garlic, onion and chili powders which I feel gives it an enhanced flavor profile. However, if you want a more basic or I hate to say “traditional” sauce simply omit these. This thin vinegary, tangy sweet barbecue sauce is great on pulled pork and other smoked meats, and can generally be found in both North and South Carolina and is often called “Piedmont” or “Lexington Style” barbecue sauce.

1 cup apple cider vinegar
1 cup water
½ cup ketchup
1 tablespoon onion powder
1 tablespoon garlic powder
2 teaspoons red pepper flakes
2 teaspoons brown sugar
1 teaspoon salt
1 teaspoon black pepper
½ teaspoon chili powder
½ teaspoon paprika

In a medium saucepan combine all ingredients and bring to a boil. Cover, reduce heat and simmer for 10 minutes, then remove from heat and cool before bottling in a squeeze bottle. Makes about 2 cups.


Cost Comparison

I am not going to do an in depth cost comparison when it comes to making your own pulled pork. Overall with rub and sauce, it is safe to say you can cook this pulled pork for less than $4.00 per pound at home. Here in North Texas are just a few barbecue place's and their price for one pound of chopped brisket or pulled pork.

Backwoods Barbecue (Canton) $17.00lb for chopped brisket.
Bodacious Barbecue $16.25lb for both chopped brisket and pulled pork.
Colter's 'Texas Style' Barbecue $13.95lb for chopped brisket.
Dickey's Barbecue $10.95lb for both chopped brisket and pulled pork.
Spring Creek Barbecue $14.95lb for chopped brisket, $13.45lb for pulled pork.

So $4.00lb for home made pulled pork versus $17.00 a pound for chopped beef is quite a bit of difference. So in the worst case scenario such as with Backwoods, the chopped brisket was 76% more expensive than making it at home. The best price was at Dickey's Barbecue and even at $10.95lb they were still 64% more expensive than cooking you own pulled pork at home.


Conclusion

Making your own pulled pork at home is easy, delicious, and way cheaper than if you purchased it at your local barbecue joint. The only downside to this recipe is that you do not get that smokehouse flavor. If you really want that smokehouse twang, you can add ½ teaspoon liquid smoke to your barbecue sauce. While I have a couple of smokers here on the homestead, and I prefer the flavor of smoked meats, not everyone has access to a smoker, so I wanted to provide you with a recipe that most of you could make.

Most of the ingredients here are recommended in our minimalist pantry series and most of you will have them in your pantry or refrigerator. So your outlay to make this recipe should only be the additional cost of the pork butt. Anyway, this is one of the recipes that my family loves that I just do not make enough of, and I hope it will become one of your families favorites as well. As always, if you have enjoyed this article, please share it with your friends and don't forget to send us a friend request on our 'CulinaryYou' Facebook page and follow us on Google+ so that you will not miss out on any of our new articles.


Resources Used In This Article:


BBQ Smoker Cookbook, By Todd Gamel (currently in editing phase)


Other Money Saving Articles On Our Blog:


Thursday, August 13, 2015


If you grew up in the 1970's like I did, you probably remember a product called 'Shake and Bake' that was marketed as a healthier alternative to pan or deep frying chicken or pork. If you have never heard of Shake and Bake that would not be surprise me either as it has not really been heavily marketed on television since the early to mid 1990's. During the 70's and 80's though their commercial's were seen on television on a regular basis. Having explained all that, Shake and Bake is a bread crumb, flour and seasoned coating that was developed for chicken and pork to mimic the crunchy texture of deep frying when baked in the oven.

It works relatively well in simulating deep frying, and when used with chicken that has the skin on makes for a petty crispy crust. When used on skinless chicken and or rabbit, you do not quite get that crispy crunchy coating as the fat from the skin is not there to crisp up as much, but I quite enjoy the flavor of the coating. It is as General Foods originally advertised “a better alternative to frying.”

Now owned by Kraft foods, there are thirteen different varieties of 'Shake and Bake' listed on their website. That's quite a few for a product which is no longer advertised on national television. Anyway, while I love fried chicken, I knew I needed to have a healthier alternative to frying. While shopping for groceries I remembered seeing 'Shake and Bake' at my local Walmart. Because this blog is all about stretching your food dollar, and giving you and you family healthier food alternatives, I thought to myself, I bet I can made a homemade version that is not only cheaper, but tastes better. I think I was successful, and I hope you think so as well.


The Ingredients

The ingredient list of both the commercially prepared and the recipe for my homemade Shake and Bake are very similar, and in this instance there is very little health advantage between using one over the other unless you are wanting to eliminate high fructose corn sugar from your diet. Eliminating the powdered chicken bouillon in the homemade recipe will however decrease the number of ingredients as well as remove any unwanted MSG. Personally I like the recipe as it stands, but feel free to modify it to suit your personal tastes.

Shake and Bake Original Chicken Seasoned Coating Mix – Enriched wheat flour (wheat flour, niacin, reduced iron, thiamin mononitrate [Vitamin B1], riboflavin [Vitamin B2], folic acid), enriched bleached wheat flour (bleached wheat flour, niacin, reduced iron, thiamin mononitrate [Vitamin B1], riboflavin [vitamin B2], folic acid), maltodextrin, salt, partially hydrogenated soybean and cottonseed oils, canola oil, paprika, contains less than 2% of celery seed, spice, high fructose corn syrup, dried garlic, yeast, dried onions, natural flavors.

Homemade Shake & Bake – All purpose flour (Wheat Flour, Malted Barley Flour, Niacin [A B Vitamin], Iron, Thiamin, Mononitrate [Vitamin B1], Riboflavin [Vitamin B2], Folic Acid), plain bread crumbs, salt, sugar, cornstarch, paprika, onion powder, garlic powder, dried parsley, and powdered chicken bouillon*.

*Chicken bouillon contains quite a few additives including monosodium glutamate (MSG). For further reading on the ingredients of powdered bouillons, see my previous article: 'Restaurants Use Them, So Should You?' http://culinaryyou.blogspot.com/search/label/Bullion.


Cost Analysis

A box of Kraft Original flavor Shake and Bake is $2.00 for a 5 ounce box or 40 cents per ounce.
Great Value all-purpose flour sells for $1.60 for a 5lb bag or 2 cents per ounce, while Great Value plain breadcrumbs are $1.68 for a 15 ounce container or 11.2 cents per ounce. As with most recipes, the spices that go into the mix are of such a small quantity they are no more than one or two pennies each. In this instance 10 cents should cover the overall cost of all the miscellaneous spices in this recipe. So when everything is totaled we see that our homemade shake and bake costs approximately 8.43 cents per ounce (8oz AP flour = 16 cents, 15oz bread crumbs = $1.68, miscellaneous spices 10 cents, total for mix $1.94 divided by 23oz = 8.43 cents per ounce) versus the Kraft brand which costs 40 cents per ounce. So we see once again that making your mix can save you a significant amount of money. In this case making your own shake and bake is 79% cheaper than buying a pre-packaged mix.


Homemade Shake & Bake

1 cup AP flour
2 cups breadcrumbs
2 tablespoon dried parsley
4 teaspoons chicken bouillon
2 teaspoons cornstarch
2 teaspoons paprika
2 teaspoon onion powder
2 teaspoons garlic powder
2 teaspoons salt
2 teaspoons sugar

Mix all dry ingredients together and store in an airtight container until ready to use.


When ready to use, add 1 cup shake and bake and 1 tablespoon of canola or vegetable oil to a medium sized bowl and stir with a fork until thoroughly mixed. Pour mix into a zip lock bag or container and add the poultry or rabbit a few pieces at a time and mix until evenly coated.


For Chicken – Place on foil lined baking sheet sprayed with a non-stick cooking spray and bake at 400 degrees for 30 minutes or until done. Do not cover chicken. (1 cup coats approximately 8 to 10 pieces of chicken or rabbit.

For Rabbit – Place in corning ware or casserole dish sprayed with a non-stick cooking spray and cover. Bake at 325 degrees for 90 minutes or until done. Take the lid off during the last 15 minutes to crisp up the coating. (1 cup coats approximately 8 to 10 rabbit hindquarters). The rabbit is cooked longer and at a lower temperature to keep the meat from drying out as it is so lean. You can experiment with a higher temperature bu run the risk of drying out the rabbit.

For Pork -  Place on foil lined baking sheet sprayed with a non-stick cooking spray and bake uncovered at 425 degrees for 15 to 30 minutes or until done. Do not cover or turn pork chops.


Conclusion

While the health benefits of making your own breading mix may not be that different from the commercially prepared product, using your homemade shake and bake as an alternative to deep fat frying is definitely a healthier choice. While we cannot put a price tag on the advantages of making significant lifestyle changes (baking versus frying), making your own shake and bake coating mix can save you and your family a significant amount of money (79%). Another way you could really cut the cost of your homemade shake and bake is if you prepared your own bread crumbs out of leftover stale bread, but that is a topic for another article. Once again I ask that if you enjoy this article and have found it informative, please share it with your friends so that they can make better informed food purchasing decisions.