Tuesday, January 19, 2016

Barbecue Pulled Pork


Fortunately we live out in the country and are right next door to my mother-in-law, in fact we share a property line. As she is in her late 70's she really just does not like to cook much anymore, so when the family gets together, my wife and I cook most of the meals. Occasionally my mother-in-law throws a frozen lasagna in the oven or has someone go to town for pizza or barbecue and she picks up the tab. Last month when some of the family was here, she sent my brother-in-law to town to buy chopped barbecue brisket. I was shocked to find out that 3lb's of chopped brisket with 16oz of barbecue sauce was $51.00 ($17.00 per pound with the sauce). In fact, I almost fell out of my chair when I saw the receipt, I mean that is crazy expensive.

As you can see from this example, sometimes the downside to living in a small town can be higher prices for some consumer items due to a lack of competition (only one barbecue place in Canton). Before I went to culinary school, I worked for a few years as a manager for Colter's BBQ and Smokehouse here in North Texas. I learned everything there from selecting the best wood and cuts of meat for smoking, to running the pit as well as managing the staff. Now, I am no 'pit master', but there is no way chopped beef brisket should cost this much. So I needed to find a barbecue solution to my mother-in-law's craving for the quick and easy 'Q'.

As always when we are shopping we are looking for good deals on meat. We came across some 10 to 12lb bone-in pork butts marked down to $1.19 lb, needless to say we bought both of them for a total of $25.59. The goal was to make barbecue pulled pork from these pork butts and them vacuum seal them in 1lb packages and place them in the freezer for when the family gets together next time. On average, the yield from a beef brisket or pork butt is about 60% of the actual weight of the uncooked meat give or take 10%. So even if these pork butts only yielded 50% of their original weight (21.51lbs), I would still have 10.75lbs of cooked pork butt which comes out to $2.38 per pound (without the sauce or spice rub).


The Recipe

This recipe is pretty simple, take your pork but out of the cryovac package and then apply your barbecue rub of choice. Now a traditional North Carolina pulled pork rub is somewhat different than a Texas style rib rub. Having said all of that, I prefer to use my rib rub recipe on my pulled pork. I know, I can hear the so called 'BBQ' connoisseur's screaming blasphamy… So shoot me, I like my rub better, and I am cooking for me and my family. Having said that, I have included two rub recipes from the 'BBQ Smoker Cookbook' that I am writing as well as two different styles of barbecue sauce. So you can choose to go for the more bold flavors of Texas barbecue, or a more traditional North Carolina style pulled pork rub. The choice as always is yours.


1 bone-in pork butt (10.5lb)
1 to 1 ½ cups barbecue rub of your choice (see below)
1 to 1 ½ cups barbecue sauce of you choice (see below)
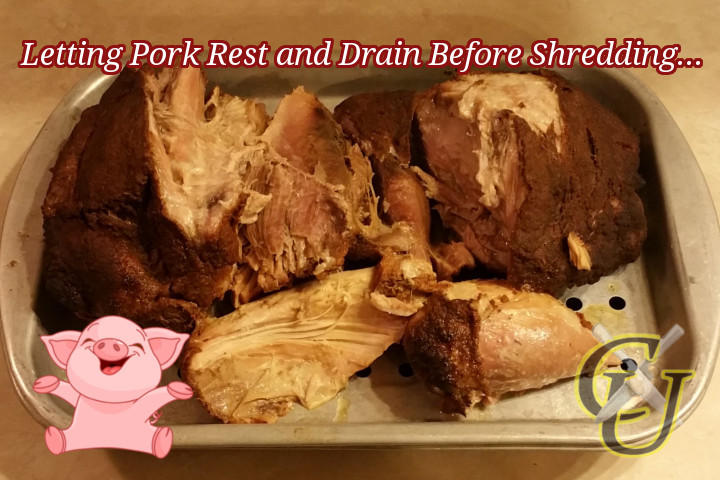


Take your bone-in pork butt and coat it thoroughly with the bar-be-cue rub of your choice. Then place the brisket in a dutch oven or large roasting pan of your choice. Place the lid on the dutch oven and bake for 225 degrees for 10 to 12 hours or until the internal temperature of the meat is greater than 170 degrees.

Chef's Note: I prefer to use my enamel coated cast iron dutch oven as it has thick walls and heats evenly helping to regulate the temperature more evenly than thin walled roasting pans. You could throw the pork butt in your slow cooker if you have one big enough and cook it overnight. According to the 'Crock-Pot' website a 6-7lb pork butt takes 9 ½ hours on low and 7 ½ hours on high so you will have to adjust your cook times depending on the size of roast you are using.


Texas Style Rib Rub (The One I used)

This is my own version of a Texas style rib rub that I developed after working for years in a local Texas barbecue establishment and lots of experiment. It is my “go to” rib rub when preparing ribs for my friends and family. I have found that this rub compliments my own Texas style barbecue sauce very well and I use them in combination to make my favorite ribs as well as the pulled pork in this article.

1 cup brown sugar
5 tablespoons chili powder
4 tablespoons garlic powder
4 tablespoons onion powder
4 tablespoons paprika
2 tablespoons salt
1 tablespoon black pepper
2 teaspoons red pepper
2 teaspoons cumin, ground
1 teaspoon cinnamon, ground

Mix spices together and store in an airtight container until ready to use. Makes about 1 ¾ cups of dry rib rub, store in a cool dark place and shake jar well before each use.


Carolina Style Pulled Pork Rub

Pork is a mild white meat that really absorbs subtle flavors well. This is my version of Steven Raichlen's North Carolina pulled pork recipe from his book “The Barbecue Bible”. I lived in Raleigh-Durham North Carolina (known as the Piedmont region) for about eight months in the mid 1990's and I believe that this dry rub is a good representation of the NC style of pulled pork. Of course, I had to make a few minor changes to Steven's original recipe, but I guarantee you will find this rub both authentic and delicious.

½ cup paprika
¼ cup brown sugar
¼ cup granulated sugar
¼ cup celery salt
1 tablespoon garlic powder
1 tablespoon onion powder
1 tablespoon black pepper
1 tablespoon white pepper
1 tablespoon dry mustard
1 tablespoon chili powder

Mix together and store in an airtight container until ready to use. Makes about 1 ½ cups of dry rub, store in a cool dark place and shake jar well before each use.


The Sauce

While the rub is your foundation of flavor, your sauce rounds out, or finishes off the overall flavor profile of the meat you are cooking. Don't get me wrong, this pulled pork is great just as it is without the sauce, but if you are going to eat it in a pulled pork sandwich or in tacos, you will need some form of sauce to fully enjoy the flavors of the sandwich. As with the rub, I prefer my own Texas Style barbecue sauce, however I have also included a North Carolina style 'piedmont' sauce (also from the cookbook in which I am writing) for a more traditional style North Carolina style pulled pork.

Texas Style Barbecue Sauce

This barbecue sauce is not only great, but it is the foundation or basis of many of variations of ketchup or tomato based barbecue sauces that I have created over time. It is my go to sauce because it is quick and easy to make.

2 cups ketchup
1 cup water
½ cup apple cider vinegar
2 bay leaves
2 tablespoons Worcestershire sauce
1 tablespoon butter
1 tablespoon onion powder
1 tablespoon garlic powder
2 teaspoons cilantro, dried (optional)
1 teaspoon salt
1 teaspoon chili powder
½ teaspoon mustard powder
½ teaspoon black pepper
½ teaspoon red pepper

In a medium saucepan combine all ingredients and bring to a boil. Reduce heat and cover and simmer for 10 to 15 minutes or until sauce is thick and coats the back of a spoon. Remove sauce from heat and cool, makes about 3 cups. If you like a thicker sauce, decrease the amount of water to ½ or ¾ cup or you can just cook it down until it reaches your desired thickness.


North Carolina Style Barbecue Sauce

I first encountered this style of barbecue sauce when I lived in the Raleigh-Durham area of North Carolina. Like everything, most cooks have their own particular take on this vinegar based barbecue sauce that is most often used on pulled pork. My particular variation includes the addition of garlic, onion and chili powders which I feel gives it an enhanced flavor profile. However, if you want a more basic or I hate to say “traditional” sauce simply omit these. This thin vinegary, tangy sweet barbecue sauce is great on pulled pork and other smoked meats, and can generally be found in both North and South Carolina and is often called “Piedmont” or “Lexington Style” barbecue sauce.

1 cup apple cider vinegar
1 cup water
½ cup ketchup
1 tablespoon onion powder
1 tablespoon garlic powder
2 teaspoons red pepper flakes
2 teaspoons brown sugar
1 teaspoon salt
1 teaspoon black pepper
½ teaspoon chili powder
½ teaspoon paprika

In a medium saucepan combine all ingredients and bring to a boil. Cover, reduce heat and simmer for 10 minutes, then remove from heat and cool before bottling in a squeeze bottle. Makes about 2 cups.


Cost Comparison

I am not going to do an in depth cost comparison when it comes to making your own pulled pork. Overall with rub and sauce, it is safe to say you can cook this pulled pork for less than $4.00 per pound at home. Here in North Texas are just a few barbecue place's and their price for one pound of chopped brisket or pulled pork.

Backwoods Barbecue (Canton) $17.00lb for chopped brisket.
Bodacious Barbecue $16.25lb for both chopped brisket and pulled pork.
Colter's 'Texas Style' Barbecue $13.95lb for chopped brisket.
Dickey's Barbecue $10.95lb for both chopped brisket and pulled pork.
Spring Creek Barbecue $14.95lb for chopped brisket, $13.45lb for pulled pork.

So $4.00lb for home made pulled pork versus $17.00 a pound for chopped beef is quite a bit of difference. So in the worst case scenario such as with Backwoods, the chopped brisket was 76% more expensive than making it at home. The best price was at Dickey's Barbecue and even at $10.95lb they were still 64% more expensive than cooking you own pulled pork at home.


Conclusion

Making your own pulled pork at home is easy, delicious, and way cheaper than if you purchased it at your local barbecue joint. The only downside to this recipe is that you do not get that smokehouse flavor. If you really want that smokehouse twang, you can add ½ teaspoon liquid smoke to your barbecue sauce. While I have a couple of smokers here on the homestead, and I prefer the flavor of smoked meats, not everyone has access to a smoker, so I wanted to provide you with a recipe that most of you could make.

Most of the ingredients here are recommended in our minimalist pantry series and most of you will have them in your pantry or refrigerator. So your outlay to make this recipe should only be the additional cost of the pork butt. Anyway, this is one of the recipes that my family loves that I just do not make enough of, and I hope it will become one of your families favorites as well. As always, if you have enjoyed this article, please share it with your friends and don't forget to send us a friend request on our 'CulinaryYou' Facebook page and follow us on Google+ so that you will not miss out on any of our new articles.


Resources Used In This Article:


BBQ Smoker Cookbook, By Todd Gamel (currently in editing phase)


Other Money Saving Articles On Our Blog:


Sunday, January 17, 2016

Ricotta And Mozzarella Stuffed Shells


Ok, so I am a huge lasagna fan, but my wife really wanted something different. While we were shopping at our local Walmart tooling down the pasta isle, she stopped and asked if I could make some stuffed manicotti. As she pulled the box off the shelf she must have seen the look on my face as she asked me “what's the matter?” Nothing I replied, I like stuffed manicotti, but it is kind of a pain in the butt as almost half your shells seem to tear or rip apart when attempting to stuff them.

Looking for a compromise, I saw a bag of jumbo shells sitting next to the manicotti, and asked what about stuffed shells? Same filling I said, just different type of pasta and quite a bit easier to stuff than manicotti. So a deal was struck, and off we went to gather the one item we needed other than the shells that we did not have at home in the fridge or in the pantry, ricotta cheese.


The Recipe

This is the same filling that I use to stuff manicotti. In fact, the cheese filling is very similar to what you would use when making a lasagna. Did I mention I like lasagna? Anyway, this is a large recipe as I stuffed all of the shells and made three small foil pans each with eight stuffed shells each that went into the freezer for future meals. So with this recipe, we fed four people from the original baking dish, and made enough for the wife and I to have three additional meals (about 40 stuffed shells total). If you do not want to make all of the shells at one time, simply cut the recipe in half. At 3 to 4 stuffed shells per person, this recipe yields about 10 – 12 portions or servings. You could easily go vegetarian with this filling by omitting the ground beef reducing the overall cost of the recipe by a small amount. Freshly julienned spinach added to the cheese mixture is also a nice addition, but I did not have any on hand at this time.

1 box jumbo shells
2 (29oz cans) spaghetti sauce
32oz ricotta cheese
8oz ground beef, cooked and rinsed
3 cups shredded mozzarella cheese
½ cup shredded parmesan cheese
1 tablespoon Italian seasoning
¼ teaspoon black pepper
¼ teaspoon salt

Brown ground beef in a skillet and then rinse with warm water in a strainer or colander to remove any leftover grease, then set aside to drain. Rinsing and draining cooked ground beef significantly reduces the fat content of the meat. See my article 'Can Cheap Ground Beef Be Healthy? You Bet!' on our blog for further nutritional information.

Cook your pasta per the directions on the box, then rinse the pasta in cool water to stop the cooking process. Fill your saucepan with cool water and allow the pasta to sit in the water while you prepare the filling.


Combine the ricotta, mozzarella, parmesan, Italian seasoning, salt, pepper, and drained ground beef in a large bowel and mix completely. In order to stuff the shells you will need a large pastry bag, or a I gallon zip lock bag which you can load the mixture in cut off one corner to use as a pastry bag to stuff the shells.

Chef's Note: The ricotta filling is actually firm enough that you could pinch off a small amount and shape it into small balls or oblong shapes and stuff the pasta shells with, but it is far easier to use a pastry or zip lock bag to fill them.


Once you have your shells stuffed with the cheese mixture, take a small amount of the spaghetti sauce and make a thin layer in the bottom your baking dish, arrange the shells in the baking dish and then pour some of the sauce over the shells. I like to toss some additional mozzarella cheese on top of the shells, sprinkle on some Italian seasoning, place a lid on the dish and bake the shells in the oven for 350 degrees for about an hour or until the sauce and cheese are bubbling.


The Cost

Stuffed shells is one of those few meals that you cannot really find a price comparison for at your local Italian restaurant. In fact, I do not think I have ever seen stuffed shells at the any of the Italian restaurant chains. Probably the closet you would come to this dish is lasagna. Although I have never been, the menu for the local Olive Garden in Tyler, TX lists the dinner entree 'Lasagna Classico' for $13.79 per order. So cheaper than you can eat one meal of lasagna at Olive garden you can make and serve 8 to 10 people stuffed shells at home.

Great Value Jumbo shells 12oz box $1.88 at Walmart
Hunt's meat flavored spaghetti sauce 29oz can $0.98 ($1.96) at Walmart
Great Value Ricotta cheese 32oz container $3.48 at Walmart
Ground beef 8oz, cooked and rinsed $1.49 ($2.98lb on sale) at Walmart
American Heritage Mozzarella Cheese 32oz ($6.84) 3 cups mozzarella cheese $2.00
Kraft Parmesan cheese 6oz ($4.24) ½ cup $1.50
Spice and Seasonings (Italian seasoning, black pepper, salt) $0.03

Total cost for 40 stuffed shells $12.34 ($0.31 per shell) or $1.24 per serving for 10 servings (4 shells per person), $0.93 per serving for 12 servings (3 shells per serving). My local Walmart carries two stuffed shell products and one stuffed manicotti.

Bertolli 'Rustico Bakes' 25oz package of stuffed shells ( 7 to 8 per package) is $5.97 ($0.74 per shell)
Celetano' brand 12.5oz package of stuffed shells (4 shells per package) is $3.47 ($0.87 per shell)
Home made Stuffed shells (40 total) is $12.34 ($0.31 per shell)
Stouffer's 29.5oz package of cheese stuffed manicotti (5 per package) is $7.95 ($1.59 per manicotti which is equivalent to about 2 stuffed shells).

Anyway you look at it you can make better quality stuffed shells for 59 – 65% cheaper than you can buy them premade at the supermarket. Not to mention the fact that you can feed 8 to 10 people homemade stuffed shells for the price of ONE lasagna dinner at the Olive Garden.

Now to be fair, you could buy a 90oz Great Value Lasagna that serves 12 people for $10.97 which is cheaper than making your own stuffed shells. My mother-in-law keeps several of these in her freezer for when the family gets together. For the price they aren't bad, but they will never be as good as home made. In fact, you will never get the quality and amount of filling that you find in these shells in a frozen stuffed shell, manicotti or frozen lasagna product. 


Conclusion

Stuffed shells and manitcotti are great, I like them both and this recipe allows us to make extra meals that we can freeze and simply throw them in the oven and bake frozen at a moments notice. We use old stale bread and make buttered garlic toast that we then wrap them in plastic and place in the freezer for when we make spaghetti or any Italian American meal in which garlic bread is a nice addition. And yes, when we served this, we used some of our prepared garlic bread and threw in a fresh garden salad to round out the meal.

You could easily go vegetarian with this filling by omitting the ground beef. Freshly julienned spinach added to the cheese mixture is also a nice addition, but I did not have any on hand at this time. If you want to make your own marinara or spaghetti sauce to use in thi recipe then check out my article 'One Sauce To Rule Them All' on our blog. As always, if you have enjoyed this article, please share it with your friends and don't forget to send us a friend request on Facebook and Google+ so that you will not miss out on any of our new articles.


Related Articles On Our Blog:


Other Money Saving Articles On Our Blog:


Wednesday, January 13, 2016

Make Your Own Jerky Spice Mixes


Wow, I knew a lot of people liked to eat Jerky, but I was surprised by the number of email responses asking about additional jerky recipes that I might have or use when making ground meat jerky. In my original article I included my own recipe for my 'original style' beef jerky made from 3lbs of 93/27 ground beef. When it comes to jerky making my 'original' style is my go to recipe. In fact, it is my base recipe for all of the different jerky flavor combinations that I make.

As I mentioned in my original article, I recommend that you use a cure when making ground beef jerky to help keep it safe and shelf stable. If you have been using any of the pre-packaged jerky spice mixes in the past or continue to do so, you will fnd that if you look at the ingredients list you will find that it contains a curing agent. Most often in the form of nitrates and nitrites, the same ingredients that you will find in Morton Tender Quick that I use.

All of the jerky recipes I use are variations of my 'original' style recipe with the addition of a seasoning blend or spice mix. Now, I have found many commercial seasonings or spice blends tend to be heavier in salt than I like, so I make most of my own seasoning blends or mixes such as Jamacian 'Jerk' seasoning, and 'Creole' seasoning. When I make my seasoning blends, I omit the salt so that I have a more control of the salt content in the final recipe. In a future article I will share with you my recipes for a multitude of spice blends that I use that have no added salt if there is enough interest in them. For now, however, using a commercial spice mix in such small quantaties my not make much difference, but if your jerky comes out slightly salty, then my recommendation would be to cut back on the seasoning or spice mixture to reduce the sodium content. Do not however cut back on the curing salt (Morton Tender Quick) as your jerky's shelf like will be greatly diminished.


The Recipes

Below you will find the most common recipes I use when making jerky. In my original article 'Ground Beef Jerky' I made a 3lb batch of 'original' style jerky out of a 3lb chub of 93/27 ground beef purchased on sale at our local Walmart for $3.99lb. Most of the time however, I like to divide the chub into 1lb portions and make three different varities of jerky at one time. In addition, my original article I mentioned Howard Reitier Eau Claire County Master Food Preserver's recommendations for the use of Morton Tender Quick in ground beef jerky. Although I have never met the man, his recipe became the basis of my 'origonal' style ground beef jerky recipe which I have adjusted over time to suit my personal tastes. I have included his orignal recipe in this article for those of you who might be interested in trying it.


Ground Beef Jerky (Original Style)

1 pound ground beef
2 ½ teaspoons Morton Tender Quick
1 teaspoon onion powder
1 teaspoon garlic powder
1 teaspoon soy sauce
1 teaspoon worchestershire sauce
½ teaspoon liquid smoke
½ teaspoon black pepper
¼ teaspoon paprika
¼ teaspoon ground cayenne pepper

Mix all the ingredients together. Set the dehydrator on the recommended setting (145 – 155 degrees) for meat jerky and follow the manufacturer’s instructions for time. When the jerky is done (about 6 to 7 hours) allow to cool completely and store in an airtight container.

You will note some small amount of fat that has pooled on the jerky when it is dried. Simply take a paper towel and blot the fat before the jerky dries completely or you will have small white spots on the surface of the jerky. It won't hurt the jerky, but can make it less appealing to some people. In the culinary world, the appearance of food and how it is presented can be just as powerful and the taste.


Ground Beef Jerky (Jamacian Style)

1 pound ground beef
2 ½ teaspoons Morton Tender Quick
1 tablespoon jerk seasoning
1 teaspoon onion powder
1 teaspoon garlic powder
1 teaspoon cayenne pepper or 1 dried habernaro pepper ground
1 teaspoon soy sauce
1 teaspoon worchestershire sauce
½ teaspoon liquid smoke
½ teaspoon black pepper
¼ teaspoon paprika

Mix all the ingredients together, and follow the directions for the 'original' style jerky.


Ground Beef South African Jerky (Biltong)

1 pound ground beef
2 ½ teaspoons Morton Tender Quick
2 teaspoons worchestershire sauce
1 teasppoon coriander powder
1 teaspoon black pepper
½ teaspoon onion powder
½ teaspoon garlic powder
½ teaspoon liquid smoke
¼ teaspoon ground cayenne pepper (optional)

Mix all the ingredients together, and follow the directions for the 'original' style jerky.


Ground Beef Jerky (Creole Style)

1 pound ground beef
2 ½ teaspoons Morton Tender Quick
1 tablespoon creole seasoning
2 teaspoons Louisania hot sauce
1 teaspoon worchestershire sauce
½ teaspoon liquid smoke
½ teaspoon onion powder
½ teaspoon garlic powder

Mix all the ingredients together, and follow the directions for the 'original' style jerky.


Ground Beef Jerky (Buffalo Wing Style)

1 pound ground beef
2 ½ teaspoons Morton Tender Quick
2 teaspoons Buffalo wing sauce
1 teaspoon worceshtershire sauce
1 teaspoon onion powder
1 teaspoon garlic powder
½ teaspoon liquid smoke
½ teaspoon black pepper
¼ teaspoon paprika
¼ teaspoon ground cayenne pepper

Mix all the ingredients together, and follow the directions for the 'original' style jerky.


Ground Beef Jerky (Teriyaki Style)

1 pound ground beef
2 ½ teaspoons Morton Tender Quick
2 teaspoons Teriyaki wing sauce
1 teaspoon worceshtershire sauce
1 teaspoon onion powder
1 teaspoon garlic powder
½ teaspoon liquid smoke
½ teaspoon black pepper
¼ teaspoon paprika
¼ teaspoon ground cayenne pepper (optional)

Mix all the ingredients together, and follow the directions for the 'original' style jerky.


Ground Beef / Ground Venison Jerky (Howard Reitier Eau Claire County Master Food Preserver)

1lb ground beef or ground venison
3 tablespoons brown sugar
2 ½ teaspoons Morton Tender Quick
1 teaspoon onion powder
1 teaspoon dry mustard
½ teaspoon garlic powder
¼ teaspoon cayenne pepper
¼ teaspoon white pepper
½ teaspoon liquid smoke

Mix all the ingredients together, and follow the directions for the 'original' style jerky.

There you have it, these six recipes will just about cover any type of jerky seasoning that you can find on the internet or on the shelves of your local supermarket or outdoor store. If you like your jerky hotter, just add some red pepper flakes. These recipes are quick and easy to make, and most of you will have the necessary ingredients needed in your pantry. I suggest that for the first time, you make the recipe as it stands, then adjust the seasonings to suit your own personal preferences. I promise you you will never go back to commercially prepared jerky seasonings again.


Jerky Seasoning Ingredients

As with most food spice mixes, there are a lot of preservatives and anti-caking agents included in commercial jerky seasonings. I am not bashing the makers of commercial jerky spice mixtures, or Backwoods in general, rather they are required by the USDA to maintain specific ingredients to make sure their products are safe for human consumption. As you can see, making your own jerky seasonings really cuts down on some of the extra ingredients that you do not need to make geat quality jerky at home.

Backwoods Original Jerky Seasoning – Salt, worceshtershire powder, monosodium glutamate (MSG), garlic salt, carboxymethyl cellulose, chili pepper, spices, mustard, malic acid, natural flavorings (spice extracts), onion, less than 2% silicone dioxide added to prevent caking, paprika, granulated garlic, red pepper, dextrose, spices and with less than 2% tricalcium phosphate added to prevent caking. Cure Ingredients: salt, 6.25% sodium nitrate, FD&C red #3 (for color), and less than 2% silicon dioxide as a processing aid.

Homemade Original Jerky Seasoning Mix – Onion powder, garlic powder, black pepper, paprika, ground cayenne pepper, soy sauce, worchestershire sauce, liquid smoke. Cure Ingredients: salt, destrose, 0.5% sodium nitrate, 0.5% sodium nitrite.

So if you are interested in what you serve you and your family, then check out the ingredient list of your favorite jerky seasoning package and see just what you are ingesting. Being inquisitive gives you the power to make your own food decisions and not rely on those of the federal government or big food production companies.


Conclusion

So there you have it, all the recipes you need to start making a vast variety of jerky seasonings. Believe me it is not difficult. I know I have left a few flavors out such as BBQ, but hey simply substitute your favorite BBQ rub or seasoning for the Creole or Jamacian seasoning and there ya go. If you grow jalapenos or any other peppers in your garden, then dry some and turn them into your own pepper powder and use as a substitute for the cayenne. The posibilities are endless, and with these recipies you have total control when making your own jerky.


Related Articles On Our Blog:

Friday, January 8, 2016

Clearing The Confusion Regarding Jams, Jellies, And Preserves.


Jelly, jams, preserves, marmalades and conserves. They all are great on toast or in a peanut butter sandwich, but what makes each unique? This was actually the conversation that Steve Coyne (Author of 'I Grow Vegetables' blog) were having the other day when were were making jelly. It was this conversation that inspired me to write this short article.

According to the FDA, they essentially they fall into two distinct categories: jelly or jam. Now as far as I am concerened, 'preserves' is a seperate category, at least they are the way my grandmother made them, however the FDA considerers preserves to fall under the classification of jams. Because I have been making jams and jellies for a many years and people often ask me what is the difference between a jelly, jam, and a preserve, I decied I would write this quick primer on the differences and similarities of each.


Jelly Or Jam, Which Is It?

Jelly – Is made from the strained juice of the fruit. Because jelly does not have any of the pupled fruit or seeds as they have all been strained out, it tends to spread more evenly than jam. It is more labor intensive (although not much) but my grandmother almost never made jelly, prefering to make jam as she did not want to strain out the “good stuff” as she called it.
  • Marmalades – A type of jelly made from citrus fruits (lemon, orange, lime etc.) in which the rind is added to and left in the final product. Marmalades have a dual flavor profile being sweet (from the jelly) and sour (from the rind). Not exactly my favorite, but my wife loves orange marmalade.
  • Fruit Butters – Are a variety of jelly, that generally consists of a combination or variety of fruits (not always) that are cooked down until they are thickened until they have the consistency of butter, hence the name 'fruit butters'. Pectin may or may not be added to the mixture depending on the recipe. Popular types of fruit used to make fruit butters include: apples, pears, and peaches. According to the FDA, all fruit butters are considered a variety of jelly.

Jam – For canning purposes, jam is made the same way as jelly, except that the fruit is crushed extracting most of the juice, however the fruit solids and seeds are left in the final product. Because of the pupled fruit and/or seeds, jams tend to be more lumpy and more difficult to spread on your toast than jelly.
  • Conserves – Are a variety of jam that generally consists of a combination or variety of fruits. In addition, many conserve recipes include nuts and/or raisins. Conserves can be both savory as well as sweet. As with jam, pectin is added to help it gel. Just like with fruit butters, according to the FDA, all conserves are jams, but not all jams are conserves.

Preserves – Are small to medium sized chuncks of fruit that are canned in either fruit juice or a simple syrup. They may have pectin added to make them slightly 'jam' like in consistency. Depending on the cook and the recipe they may include a fair amount of crushed fruit, but they are generally less processed than jam. Therefore I consider them to be in a seperate category, but this is only my personal opinion. Preserves gets it's name as it was one of the original ways to 'preserve' whole or slightly crushed fruit. Thereby by allowing the preserved fruit to be later used to make sauces and flavor other types of foods during the cooking process. Of all of these categories, preserves are the least processed (i.e. they are not smashed, blending or pulped).


Conclusion

So there you have it, essentially all of these products fall under one of two categories if you consider preserves to be a jam as the FDA does. Regardless of whether you call them, jams, jellies, conserves, marmalades or preserves, they all taste great on your buttered toast or biscuits at breakfast or on a peanut butter samdwich at lunch. Preserves are especially nice fresh hot waffles or when used as a topping for homemade ice cream, or any ice cream for that matter.


More Information Related This Article:


More Related Articles On Our Blog:


Making Jelly From Juice


Recently when my wife and I were shopping at our local Walmart we came across two different types of juices that were going to expire in May of 2016 (six months from they day we bought it). They were apple/mixed berry 96oz marked down to $1.00 each, and plain apple juice 64oz marked down to $1.00 each. Ounce for ounce the mixed berry juice was cheaper (33% more juice) than the apple, but for $1.00 each we bought 4 of each bottle for a total of $8.00. So with Christmas coming up, it was time to make some Christmas jelly to share with our friends and family.

Making your own jelly can not only be a great way to save money, but it is pretty satisfying knowing that you created something with your own hands. To make your own jelly you do not have to have access to an orchard or berry plants, you simply have to have a grocery store in your neighborhood in which you can purchase the juice to make the jelly. To be honest, it is as simple as that. If you have never canned before then making your own jelly is a great way to get started in the wonderful world of canning and preserving food.

After using this recipe to make 16 half pints (8oz jars) of jelly for Christmas presents we still had plenty of juice left over. So a couple days after Christmas we had our friends Steve Coyne (author of the 'I Grow Vegetables Blog') and his wife Sue as well as Rhonda and Andrew Jones over to talk all things homesteading and share ideas and information regarding food preservation. Steve brought two cases of half-pint jars (8oz) and I supplied the lids, bands and other ingredients and we made 24 half-pints of jelly using this recipe. As we were visiting with friends, I did not take a lot of pictures, so this article will only be semi-illustrated...sorry.

Before you get started making your own jelly, you will need to get your water bath canner, jars and canning supplies ready. I am not going to go into detail on how to sterilize your jars before canning your jelly in this article as I have covered this in another article on the blog. You can find detailed instructions regarding water bath canning at 'Canning Basics: A Step-By-Step Guide'.


Basic Jelly Recipe From Juice

Now there are quite a few jelly recipes out on the wide world web, and I guess I am going to add mine into the mix, but I cannot really take credit for this recipe. In fact, I use the standard Kraft brand Sure-Jell recipe that you can find on their website for making Jelly from juice. While the instructions that come with the Sure-Jell pectin are through, even I find them somewhat confusing and contradictory, however, the recipe listed below is an old one that Kraft still has on it's website. I have been using this recipe to make jelly from fruit juice for years and it has worked for me every time.

1 box of Sure-Jell powdered pectin
4 cups of juice (any type)
5 cups sugar
1 tablespoon butter (optional)

Gather you jars and all necessary equipment and clean and sterilize them. For step-by-step instructions on how to clean and sterilize your jars and equipment, see my article 'Canning Basics: A Step-By-Step Guide' on our blog.

Measure out 4 cups of juice into a 6 to 8 quart saucepan. Add the pectin and optional butter to juice and heat the mixture to rolling boil (a boil that doesn't stop bubbling when stirred) stirring constantly. Then add the sugar and stir until it is fully incorporated into the juice. Then bring the juice mixture back to a rolling boil and boil exactly 1 minute, stirring constantly. Remove the juice mixture from the heat and skim off any foam that may have occurred on top of the juice with a spoon.

Chef's Note: Do not try and double this batch. Making batches larger than this recipe is one of the more common reasons for set failures. If you have to, make a batch and take a break in between, but again I would not double the recipe.

Ladle into your cleaned and sterilized jars leaving ¼ inch of head space. Wipe the rims of the jars with a damp paper towel and cover with two-piece band and lids. Screw the bands until they are hand tight. Place jars in water bath canner. If using a canning rack, add the jars to to rack, then lower the rack into canner. Making sure the water covers the jars by 3 to 4 inches.

Place a lid on your water bath canner and bring the water to gentle boil. Once the water is boiling, process the jelly for 5 minutes. Remove jars and place upright on a wire rack or towel to cool. After jars are cool, make sure to check the seals by pressing middles of lids with finger. (If lids spring back, lids are not sealed and refrigeration is necessary.)

Chef's Note: Some juice takes longer to set than others. Even if the jar is cool to touch, the jelly will need 24 hours for the pectin to fully set. Juices made from fruits that are higher in pectin will typically gel faster then low pectin fruits.


Choosing Your Pectin

When it comes to making jelly, jams, and preserves, it's all about the pectin. Pectin is a natural enzyme found in fruits and vegetables. Fruits such as apples, pears, plums, oranges, guavas, and other citrus fruits have large amounts of natural pectin, while cherries, strawberries, blackberries, and grapes contain small amounts of pectin. While most fruits contain pectin (primarily in the skin of the fruit), additional pectin is required to make sure that your jelly, jams, and preserves 'set' or 'gel' correctly. In addition to pectin, sugar is one of the primary ingredients in jams and jellies that not only makes the final product sweet, the sugar actually enhances the gelling power of the pectin. This is why some canners have difficulty with their jelly, jams, and preserves setting properly when using sugar substitutes and regular pectin. If you want to use a sugar substitute like Splenda or Stevia, then you need to use a product like 'Sure-Jell for Lower Sugar Recipes pectin'. 


Powdered Pectins

The only type of pectin I have ever used to make jelly and jams is 'Sure Jell' powdered pectin. A 1.75oz box of Kraft 'Sure Jell' is $2.97 (at Walmart). Ball also makes a powdered pectin that comes in 4.7oz container for $9.47 (at Walmart). To use the Ball pectin, you can log onto their website and choose the individual type of fruit for the required amount of pectin (about 1 tablespoon for each ¾ cup of juice). Both work well, but for me I prefer to just open the powdered pouch and pour it into my juice. If you are using smaller amounts of juice, the Ball pectin may be a better choice for you. One major advantage of using Ball powdered pectin is that comes loose in the jar which can be helpful if you wish to try and fix a jam or jelly that will not set, but it is a lot more expensive than Sure-Jell.


Liquid Pectins

Both Kraft and Ball make liquid pectins. The Kraft brand 'Certo' is $3.97 for a 6fl oz box with two 3oz pouches (at Walmart) and Ball's 'Real Fruit' liquid pectin is $6.38 for 6fl oz box with two 3oz pouches. As I mentioned previously, I have never used liquid pectin, but I know people who have used it with good results. In my experience the liquid pectin is slightly more expensive, especially the Ball brand. Like most of us, I am a creature of habit, so when it isn't broke, I don't try and fix it, so I always use powdered pectin.


Cost Analysis

My original goal of this was not to do a cost savings analysis, we simply bought the juice to make jelly to share with our friends and family, but old habits die hard, and I wanted to see how much it really costs me to make this jelly from clearance juice. I opted not to perform any price comparisons so if you want to see the actual savings you can achieve from making jelly from store bought, then you will have to look at the supermarket next time you visit, or compare prices here on the internet.

So how much did It actually cost to make this jelly using bottled or canned juice? And can you really save any money making your own jelly at home from bottled juice? Obviously your choice of juice and the type of pectin you will use will affect the final price of your jelly. For our recipe we were able to purchase the a 96oz of Apple/Mixed Berry juice for $1.00 ($0.01 per ounce), the 64oz jar of Apple juice was $1.00 ($0.015 per ounce). The Sure Jell was $2.94 for one box, and 5 cups of sugar $1.09 ($0.031 per ounce).

Mixed Berry Jelly (2.94 + 1.09 + 0.32 = $4.35 for 8 half pint (8oz jars), that's $0.54 per jar ($0.07 per ounce).
Apple Jelly (2.94 + 1.09 + 0.48 = $4.51 for 8 half pint (8oz jars), that's $0.56 per jar ($0.075 per ounce).


When Your Jelly Dosen't Set?

So what happens when your jelly does not set or gel after 24 hours? There are many causes that I will not go into in this article, but if your jelly does not set it is not the end of the world. As I mentioned earlier, if you follow these directions, you should not have any problems, but alas we are all human. The few times I have had a jelly not set properly I simply used it as a syrup. Syrup's like this are great on pancakes, waffles or biscuits fresh from the oven. Like Jellies, fruit syrups make great gifts, and unless you tell everyone your jelly failed to set, they will never know unless you tell them.

I have never attempted to fix a jelly that would not set, as I mentioned I use them for syrup. However, if you are constantly having set problems, there are a few different options or ways that you may be able to get your jelly to set. On their website, Ball lists some major problems you may encounter during your jelly adventures including ways to fix jellies that will not set. For more information check out their web page 'Ball Problem Solvers: Jams and Jellies'.


Conclusion

We had a great time socializing and making jelly with our friends, and with 24 half-pints, there was plenty of jelly for everyone to take home. If you have never tried your hand at canning, making your own jelly is a great way to get started. After all, who doesn't love opening a jar of homemade jelly and spreading it on your buttered toast, or making a peanut butter and jelly sandwich with your own jelly?

You can make jelly from just about any type of juice, even the frozen concentrates as long as you follow the directions for re-constituting them correctly. I recommend that you use only 100% juice when making jelly for best results, stay away from 'fruit flavored' juices. I hope that you and your family will enjoy making and eating your own jelly for years to come. I know our family loves it when we make jelly and share it with them and I am sure yours will too. As always, if you have enjoyed this article, please share it with your friends and don't forget to send us a friend request on Facebook and Google+ so that you will not miss out on any of our new articles.


Related Articles on Our Blog:


Tuesday, January 5, 2016

Canning Basics: A Step-By-Step Guide


I have written many different articles about canning meat, vegetables, sauces etc. on our blog, but I realized I have never written a simple and concise article regarding the basic steps for canning foods safely. After all, canning and preserving food is a relatively simple process, regardless of whether you are going to use a pressure canner or a water bath canner, the preparation steps are the same. In fact, all of the equipment needed to preserve meats, vegetables, fruits, and sauces is the same with the exception of the pressure canner and water bath canner. So regardless of the type of canner you are using, if you follow the steps outlined in this article you will able to safely preserving your bounty.


Step One: Grab Your Recipe

Grab your recipe and take a look at the type of food you will be processing. In general, all foods containing meat (beef, chicken, fish, rabbit, and wild game), broths, beans, corn, carrots, and seafood should be processed in a pressure canner. While jellies, jams, tomatoes, lemons, oranges, pickles, and pears can be safely canned in a water bath canner.

You need to take care with combination foods. While tomatoes can be safely canned in a water bath canner with the addition of a little citric acid, if meat is added to the tomatoes such as when making chili or spaghetti sauce you will have to use a pressure canner to safely preserve the final product. Personally, anytime I add a low acid food to a high acid food (squash and zucchini in tomato sauce), I process the final product in a pressure canner. For an in-depth look at determining the proper type of canner to use in order to preserve your food safely, check out my article “To Pressure Or Not To Pressure: That Is the Question” on our blog. Now that you have your recipe and determined the proper canner to use, and you need to gather the rest of the equipment you will need


Step Two: Gathering Your Equipment

It is important to make sure you have the required amount of clean canning jars, lids and rings that you will need to process your meat, vegetables, soups, stocks, or jelly. Believe me, nothing is worse then running of canning jars before you have all your food processed. If you haven't cleaned your canning jars prior to starting, now is a good time to do so. At this point the jars do not have to be sterile, just clean. We will sterilize them later.

In addition to your jars, lids and bands, you want to gather your jar tongs, magnetic lid lifter, canning funnel, ladle and a bubble remover (a small plastic spatula will work). In my own personal inventory, I keep a couple of plastic canning funnels and ladles so that when I get knee deep in canning, I do not have to keep washing and re-sterilizing dirty equipment. However having one of each will suffice. 


While all of these items may seem self explanatory, a canning funnel has one end that sits evenly onto the jar and allows you to fill the jar without dirtying the rim or outside of the jar. While some home canners do not think they are necessary, they make canning so much easier and they only cost a couple of dollars at your local Walmart. Personally, I do not can without one.

The last piece of equipment that you will need is your actual canner. The type of food you will be canning will determine the type of canner you need. For low-acid foods you will need to use a pressure canner, for high acid foods and jellies, you can use a water bath canner. Looking at your recipe should have already given you a good idea of which type of canner you need to use. However, if you are still unsure of which type of canner to use you can check out my article “To Pressure Or Not To Pressure: That Is the Question” on our blog.


Step Three: Cleaning, Heating and Or Sterilizing Your Jars

It should be noted that most of the foods that you can, do not require you to sterilize your jars. The USDA Complete Guide To Home Canning (2015) states: Empty jars used for vegetables, meats, and fruits to be processed in a pressure canner need not be presterilized. It is also unnecessary to presterilize jars for fruits, tomatoes, and pickled or fermented foods that will be processed 10 minutes or longer in boiling water canner (p 1-15). Having said that I sterilize all my jars just out of habit, but it is not necessary.

Fill your stockpot or water bath canner about ¾ full with water and put on the stove and set it on high. If you do this step before preparing your food, then your canner should be ready just about the time you are ready to process your food items. You do not want to be waiting 20 minutes or longer after you have finished preparing the food you wish to can for the canner to be ready.


At this point your stockpot or water bath canner should be simmering or even possibly boiling which is a good thing because before we process any food items, we are going to use the stockpot or water bath canner to heat our canning jars. Using your jar tongs place the jars in your water bath canner in small batches and leave for 10 minutes to heat the jars. It is important to make sure the jars are thoroughly covered by the boiling water to completely heat them. If you can, leave the jars in the simmering water until ready to use, otherwise, remove the hot jars to a wire rack or a bath towel folded in half to protect the counter. I also take the time to soak funnels and any other equipment that will come in contact with the food during the canning process, but this is not necessary.

The Ball Blue Book of Canning (2011) states: Jars should be heated for 10 minutes before filling to prevent breakage. Submerge the jars in enough water to cover. Bring to a simmer (180 degrees), keeping jars in simmering water until ready for use (p. 10). The USDA Complete Guide To Home Canning (2015) states: Submerge the clean empty jars in enough water to cover them in a large stockpot or boiling water canner. Bring to a simmer (180 degrees), keeping jars in simmering water until it is time to fill them with food (p. 1-14). If you want to sterilize your jars, then you need to heat the water to boiling (212 degrees) and then leave them for in for 10 minutes before removing.

While you are heating your jars, take a small saucepan and fill with water and set it on high and heat it just until it starts to boil. Turn the burner down to low or simmer and add your rings and lids. Now it's time to get your food prepped and prepared for canning.


Step Four: Prepping and Preparing Your Food

Now that you have your recipe, the proper canner, and all of your canning equipment (ladle, funnels, lid lifter, and bubble remover) and your jars. It's time to go ahead and prepare the food your are wanting to preserve per your recipes instructions as needed prior to canning. Once your food is ready, grab your jars and get ready to fill them as instructed and place them in either your water bath or pressure canner to be processed.


Step Five: How To Use Your Water Bath and Pressure Canner

A water bath canner relies on the temperature of the boiling water to preserve food (water boils at 212 degrees) therefore the contents of the canning jars in a water bath canner can never exceed the temperature of the boiling water. A pressure canner on the other hand relies on a small amount of water which is heated and pressurized to bring the internal temperature inside the pressure canner above the boiling point of water (5psi = 227 degrees, 10psi = 240 degrees, and 15psi = 257 degrees) in order to preserve low acid foods safely. Now that you know the how and why, we can get on to instructions for using each individual type of canner. For more specific information regarding the different types of pressure canners check out my article “Yes You Can!: Preserving Your Bounty” on our blog.


Step Five A: Using A Water Bath Canner

Once your jars have been heated and the food you wish to process is ready, take your canning funnel and fill the jars leaving the required amount of head space per your recipe (usually ¼ to ½ inch). Wipe the rim of the jar with a damp paper towel and remove a lid and ring from the small saucepan and place onto the jar and hand tighten. Then using your jar tongs place the jar into the water bath canner, repeating this process until your water bath canner is full or you run out of jars to process. Once all the jars are in the water bath canner, make sure the jars are covered by 3 to 4 inches of boiling water, then cover the canner to maintain the heat and process for the required amount of time as indicated by your recipe.


Step Five B: Using A Weighted Gauge Pressure Canner

Once your jars have been heated, add 3 to 4 inches of water to your pressure cooker and bring it it a slight boil. Once the water is boiling, add the food you wish to process is ready, take your canning funnel and fill the jars leaving the required amount of head space per your recipe (usually ¼ to ½ inch). Wipe the rim of the jar with a damp paper towel and remove a lid and ring from the small saucepan and place onto the jar and hand tighten. Then using your jar tongs place the jar into the pressure canner, repeating this process until your pressure canner is full or you run out of jars to process.

Once the pressure canner is full, place the lid on the canner and increase the heat under the canner until steam begins to come out of the vent. Then place the appropriate weight as called for in your recipe. Once your pressure canner starts to rock the weight, reduce the heat source until it “rocks” or releases pressure every 15 – 25 seconds, then start your timer and process for the indicated amount of time called for in your recipe.


Chef's Note: If I am ever unsure of the exact pressure to use on my weighted pressure canner, then 15psi is my default pressure setting.


Conclusion

These are the steps that I follow almost every time I can meats, produce, soups and jellies. I have performed these steps in this order so many times that I can almost do them in my sleep. I am not going to tell you that these are the only steps to follow and that you have to follow them in this order, rather they work well for me, and in my experience follow a pretty logical progression. Gather your recipe, gather your equipment, clean and sterilize your equipment and jars, prep your food, then process your food. Like I said at this beginning of this article, the steps involved to preserve your own food and food products is simple and quite satisfying.

You may notice that my instructions for using a pressure canner are for a weighted gauge pressure canner, I have never used a dial gauge pressure canner so I am not comfortable giving instructions for something in which I have never used. If you have a dial only pressure canner, I suggest you consult the manufactorers instruction manual regarding it's proper usage. As always, if you have enjoyed this article, please share it with your friends and don't forget to send us a friend request on Facebook and Google+ so that you will not miss out on any of our new articles.


Related Articles on Our Blog: